Blog18 min read
Code Handover Checklist: What Genuinely Good Documentation From an Outsourced Team Looks Like
By Huzefa Motiwala · Co-Founder & Chief Product Officer
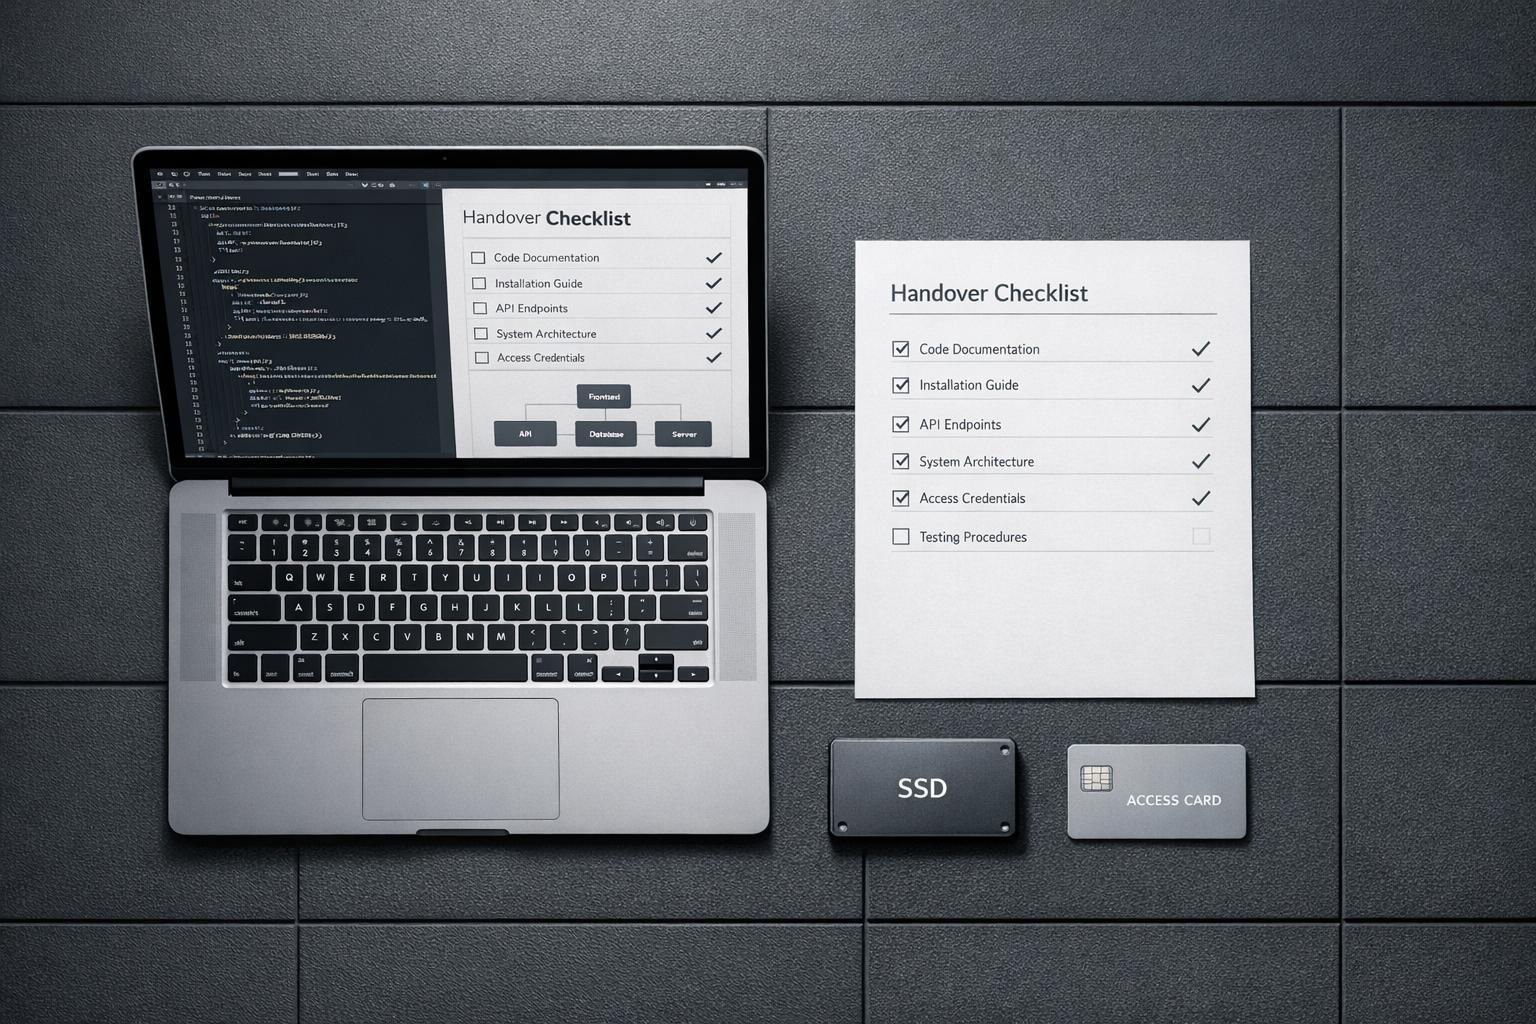
When outsourcing software development, the final handoff of code and documentation is critical. Poor documentation can leave you unable to manage or evolve your product, leading to costly delays and security risks. The key to a successful handover is ensuring operational independence - the ability for your team to take over without relying on the original vendor.
Here’s what good handover documentation should include:
- Project Overview: A one-page summary of the product’s purpose, user personas, use cases, and compliance requirements.
- Ownership Details: A stakeholder directory with roles, contacts, and escalation paths, plus a RACI matrix for clarity on responsibilities.
- Codebase Access: Full repository transfer with history, admin rights, and branching strategies documented.
- Architecture Insights: High-level diagrams (e.g., C4 model) with labeled interactions and deployment details.
- Code Health Report: A "Traffic Light" system to assess stability, risks, and technical debt priorities.
- Runbooks: Step-by-step guides for local setup, testing, deployment, and incident resolution.
- API and Data Models: Detailed API references, OpenAPI specs, and entity relationships for seamless integration.
- Monitoring and Alerts: Clear alert classifications and actionable runbooks for production issues.
- Knowledge Transfer Plan: Live walkthroughs, shadow periods, and recorded sessions to ensure a smooth transition.
A structured process like this ensures the incoming team can manage the system from day one, reducing post-handover issues by up to 70%. The ultimate test? A developer should be able to set up and deploy the system using only the provided documentation.
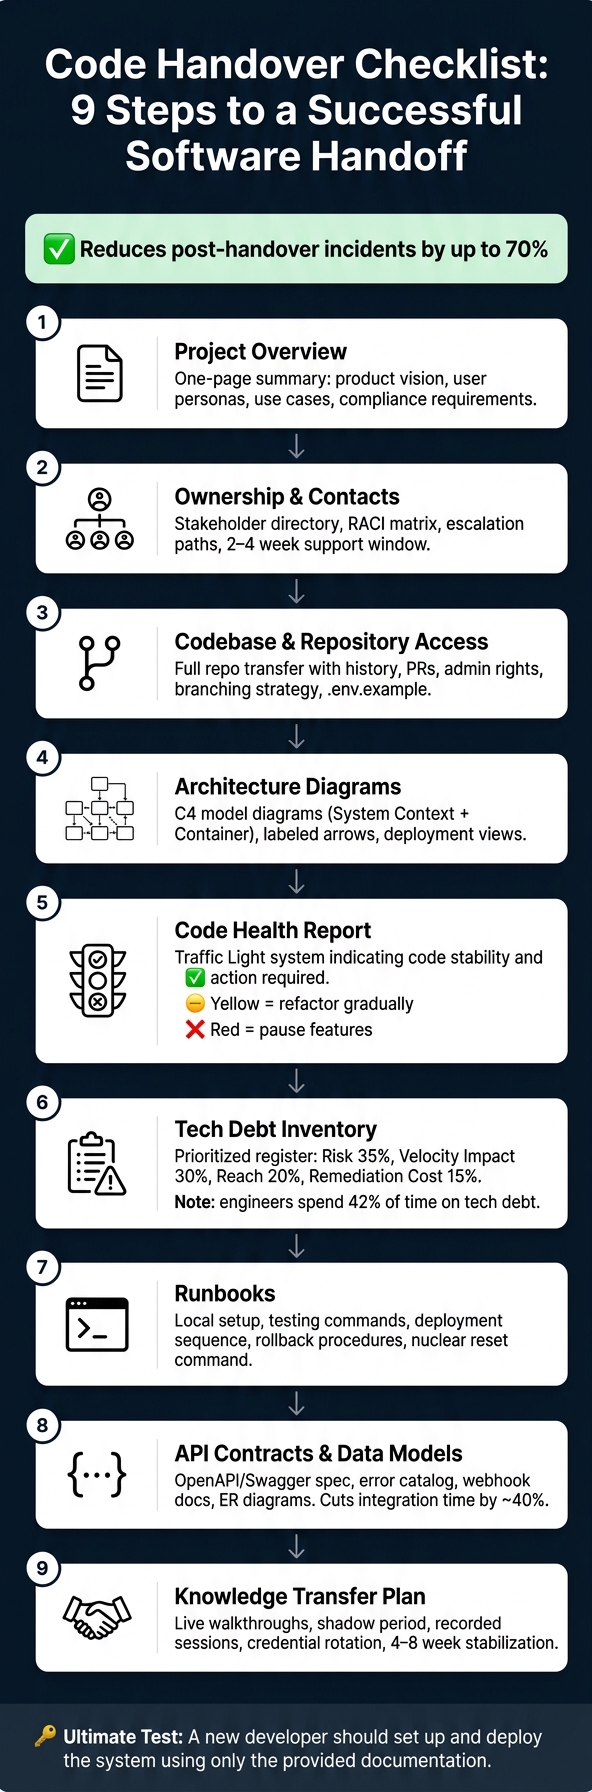
Code Handover Checklist: 9 Steps to a Successful Software Handoff
Scope and Ownership Snapshot
When a new team takes over a project, they need to grasp its purpose, ownership structure, and where the systems reside. This understanding starts with a well-prepared project overview that sets clear expectations from the very beginning.
Project Overview and Objectives
A project overview is essentially a one-page summary answering key questions: What is the product? Who uses it? What problem does it address?
This summary should include the product vision, detailed user personas, primary use cases, and a clear distinction between what is included in the project scope and what has been intentionally excluded. For systems handling sensitive data, such as those subject to HIPAA or GDPR, compliance requirements must be explicitly stated [3][6]. Additionally, providing a 12-month roadmap aligned with the product’s OKRs gives the incoming team a strategic framework to work within, rather than just a technical snapshot [3].
"Documentation is not a courtesy; it is a transfer of knowledge that future teams will otherwise have to rediscover at your expense." - Bitecode [5]
Ownership and Contact Details
Understanding project goals is only part of the equation. Having the right contacts is essential for smooth operations. A stakeholder directory is invaluable here, listing key individuals across all functional areas - product, engineering, DevOps, security, and data. This directory should include names, roles, email addresses, and preferred communication methods [6].
To eliminate confusion, use a RACI matrix to define roles and responsibilities. It clarifies who makes decisions, who should be informed, and who simply needs to stay in the loop [3][6]. Also, make sure to outline escalation paths for production incidents, so the new team knows exactly who to contact in case of emergencies. Finally, specify the outgoing team’s availability after the handover - negotiating a 2-4 week transition support period is a practical standard [6].
Codebase and Repository Map
A proper handover goes beyond a simple zip file. Ensure the full repository is transferred, complete with history, pull requests, issues, tags, releases, and admin rights. Without admin rights, the team won’t be able to manage critical elements like webhooks, branch protection rules, or CI/CD integrations independently [5]. Control over the repository is essential for operational autonomy.
The repository map should include every repo’s URL, a brief description, the default branch, and the branching strategy used by the outgoing team (e.g., GitFlow or trunk-based development) [6][1]. Providing a .env.example file with all required environment variables, along with pinned dependency versions in files like requirements.txt, helps avoid the dreaded "it worked on their machine" scenario from the start [7].
| What Was "Delivered" | What Was Actually Handed Over |
|---|---|
| Zip file or read-only repo access | Full repo with history, PRs, issues, and admin rights transferred [5] |
| Verbal IP confirmation | Written assignment and third-party account ownership transfer [5] |
| Basic README and API docs | Architecture Decision Records, runbooks, and data model docs [5] |
| Basic feature list | Vision, OKRs, and 12‐month roadmap [3] |
Architecture and Codebase Health Overview
Once the incoming team understands who owns what and where everything resides, the next step is figuring out: what does the system look like, and how well does it function? This is where having quality documentation makes all the difference.
High-Level Architecture Diagrams
A good architecture diagram doesn’t try to cram in every single detail. The C4 model offers a practical way to approach this. Start with a System Context diagram (Level 1), which shows the system as a single unit interacting with external actors like payment gateways or email services. Then, move to a Container diagram (Level 2), which breaks the system into deployable parts - such as a web app, API service, database, or message queue - and clearly labels each one with the technology it uses (e.g., “Node.js API,” “PostgreSQL 16,” “React 19”).
Every arrow between components should be labeled. Not just drawn - labeled. As Pillai Infotech aptly states:
"Arrows without labels are meaningless. Does this arrow mean ‘calls via HTTP,’ ‘publishes an event to,’ or ‘depends on at compile time’?" [8]
For deployment views, include specific details like cloud regions, VPC tiers (public, private, or isolated), load balancers, and Kubernetes configurations. Teams with thorough architecture documentation typically onboard new developers in about half the time compared to teams that lack it [8]. To keep diagrams up-to-date and version-controlled, use tools like Mermaid or Structurizr, storing them as code in the repository. This way, they can be reviewed alongside the codebase in pull requests [8].
Traffic Light Report for Code Health
A Traffic Light Report gives a quick, honest snapshot of which services are stable and which require attention. Each service is assigned a Red, Yellow, or Green label based on clear criteria - not just gut instinct.
| Status | What It Means | Recommended Action |
|---|---|---|
| 🟢 Green | Reliable, well-tested, easy to maintain | Protect with tests; avoid unnecessary changes |
| 🟡 Yellow | Slows delivery but isn’t critical | Refactor gradually; dedicate 20% sprint capacity |
| 🔴 Red | High risk - security issues, crashes, or potential data loss | Pause new features; focus on stabilization |
Some issues automatically push a service into Red, like hardcoded credentials, no automated tests, missing CI/CD pipelines, or reliance on a single person for system knowledge [10]. Systems with high technical debt are 2-3 times more likely to suffer production failures [9], making this report an essential tool for managing risk.
AlterSquare’s AI-Agent Assessment can take this a step further by analyzing the codebase to produce a detailed System Health Report. This includes insights on architectural dependencies, security flaws, performance issues, and technical debt hotspots. The Principal Council then applies business context to create the final Traffic Light Roadmap.
Tech Debt Inventory and Roadmap
A prioritized debt inventory is far more effective than a cluttered list of Jira tickets. While tickets track individual tasks, a Technical Debt Register tracks the system’s overall condition. Each entry should include:
- A brief description of the debt and its location
- A quantified business impact (e.g., hours lost per feature or incidents in the last 90 days)
- The root cause
- A remediation plan with estimated effort (in person-weeks)
- A remediation trigger - arguably the most critical piece.
"The remediation trigger is the most important field. Without it, every debt item gets the same treatment: ‘we should fix this someday.’ With a trigger, you have a clear decision point." - CodeIntelligently [11]
Keep the register concise. If it grows beyond 20 items, it becomes unwieldy - merge related issues and drop anything that hasn’t been reviewed in two quarters [11]. To prioritize, weigh items based on Risk (35%), Velocity Impact (30%), Reach (20%), and inverse Remediation Cost (15%). This ensures the most impactful fixes are tackled first. On average, engineering teams spend 42% of their time managing technical debt [9], so having a structured, prioritized roadmap is one of the most valuable tools an outgoing team can provide.
Runbook for Local Development, Testing, and Production
A thorough runbook does more than showcase technical know-how - it ensures a smooth operational handoff. If your handover package stops at architecture diagrams and debt reports, the incoming team may struggle to get the code running. A runbook fills this gap, equipping new team members to get started quickly without needing constant guidance.
Local Development Setup
For a new developer, setting up the environment should be as simple as cloning the repository, running a single command, and being ready to work within minutes. To achieve this, document all prerequisites - like the required versions of Docker, Node.js, and any specific CLI tools. Provide a setup script that checks for these dependencies and installs them automatically.
Environment drift can lead to productivity losses ranging from $78,000 to $195,000 per year [12]. To avoid this, treat configurations as code. Version-control your environment definitions, containerize essential infrastructure like PostgreSQL and Redis to ensure consistency, and include a .env.example file listing all required variables with clear placeholder values.
"The rule of thumb: match configuration exactly, scale resources proportionally." - Simon Kubica, Alloy.app [12]
When managing secrets, your .env.example file should indicate where each value is stored - whether it’s AWS Secrets Manager, HashiCorp Vault, or a shared password manager. Avoid embedding sensitive values directly into documentation. Also, include a "nuclear reset" command (e.g., ./setup.sh --reset-all) to help developers quickly reset their environment if it falls out of sync.
Once the local environment is ready, the next focus is on validating its functionality through a well-defined testing approach.
Testing Strategy and Commands
Your documentation should explain the available tests, how to run them, and what results to expect. Include details about the types of tests - unit, integration, load, or chaos engineering - and the exact commands for running each suite, along with typical execution times.
Use descriptive tags (e.g., #sanity, #api, #performance) so developers can run specific subsets of tests rather than waiting for the entire suite to complete. Additionally, provide seeding scripts and anonymization methods for handling sensitive data during testing.
Define coverage expectations clearly - not just as a percentage, but by specifying which parts of the application are covered and where there might still be gaps.
Deployment and Rollback Procedures
Once testing confirms the system’s integrity, follow a structured deployment and rollback plan. Deployment documentation should follow a "fail fast" sequence: lint and type-check → unit tests → build → end-to-end tests on staging → approval gate → production deployment → post-deployment smoke tests [13][14]. Each step should include detailed commands or reference CI/CD workflow files.
Database migrations are often the riskiest part of deployment. Never automate migrations in production; instead, use a manual trigger with a confirmation step to prevent accidental execution [13]. For schema changes, adopt an expand-contract pattern: add new columns first, backfill data, then remove the old schema in a later release to ensure stability.
Rollback instructions should be as detailed as the deployment steps. Clearly explain how to list available revisions and the exact command to revert to a stable version. As one guide aptly states:
"A deployment without a rollback plan is a deployment that will eventually cause an incident with no recovery path." - Prod Forge [14]
Lastly, ensure error tracking tools (like Sentry) and production telemetry are active before the first deployment. Without proper monitoring, the team may be caught off guard if issues arise early in production.
API Contracts, Data Models, and Integration Details
This part of the documentation bridges technical setup with business operations, making it easier for new teams to grasp and maintain key system interfaces. Even with a perfectly configured local environment, developers can’t perform effectively if they don’t understand what an endpoint requires or how a Customer entity connects to an Order.
API Reference and Contracts
Every API endpoint should be meticulously documented. Include the HTTP method, URL, parameter types with constraints, and examples that use real-world data instead of placeholders. Authentication methods like API keys, OAuth 2.0, or JWTs should be explained once, with header examples provided for every endpoint.
A machine-readable OpenAPI (Swagger) specification is essential. Teams that rely on OpenAPI-driven documentation can cut integration time by about 40% compared to those using manual reference pages [15]. Pair this with an error catalog that details every 4xx and 5xx status code, their triggers, and resolution steps. Clearly outline rate limits and idempotency rules (e.g., Idempotency-Key headers) to avoid hiding critical details in unrelated files.
"If a developer can copy your example into a terminal and get back a 200 inside two minutes, your docs are doing their job. If they can’t, the rest of the page doesn’t matter." - Docsio [15]
For systems using webhooks, document event types, payload structures, retry strategies, and HMAC-SHA256 signature verification. This level of detail prevents security risks like spoofing and saves incoming teams the hassle of reverse-engineering.
Once the API is well-defined, the focus shifts to mapping the core business entities that power your application.
Core Domain Models
Translate your system’s tables and collections into understandable business entities like Order, Customer, or Inventory. Use tools like Mermaid to create ER diagrams or NoSQL structure maps, ensuring diagrams stay version-controlled within the repository.
Each entity should have its key fields, validation rules (such as RFC 5322-compliant email formats), and its aggregate root clearly defined. The aggregate root is the entity responsible for maintaining consistency within its boundary. For systems with complex states, include a state inventory that lists all stores (e.g., databases, caches, JWTs), what data they hold, and their access patterns (e.g., "Read-heavy, keyed by user ID"). This documentation not only aids in understanding the current codebase but also guides future development decisions, reinforcing long-term product stability.
"Code tells you what the system does. Architecture docs should tell you why it does it that way, and what alternatives were considered." [8]
Third-Party Integrations
External integrations need the same level of documentation as internal systems to ensure smooth operations. For every external dependency - like payment gateways or analytics tools - clearly document the API version, base URLs, authentication methods, rate limits, and error handling protocols. Include a vendor exit plan detailing data portability, feature gaps, and conditions for migration [17].
Studies show that annual maintenance for integrations can cost 15-20% of the original development cost per integration [16]. These costs can spiral if incoming teams have to rediscover critical details, such as how to verify a Stripe webhook or why a Twilio call uses exponential backoff. A detailed exit plan for each key integration sets apart a well-prepared handover from one that causes headaches down the line.
Operational Playbook and Continuity Plan
Once detailed technical documentation is ready, the next step is ensuring smooth operational continuity through a well-structured playbook. This step is essential to avoid downtime and ensure a seamless transition. Without it, the new team might find themselves scrambling when something breaks in the middle of the night.
Monitoring and Alerting
Clear and actionable monitoring documentation is key. Alerts should be categorized to guide appropriate responses:
- Page-worthy: Immediate issues with customer impact that demand urgent action.
- Ticket: Problems that can wait until regular business hours.
- Log only: Informational alerts useful for debugging but not requiring immediate attention [18].
This classification helps avoid unnecessary stress by ensuring the team doesn’t treat every alert as a crisis. As Staff SRE Zak Hassan explains:
"An on-call rotation with 50 alerts per week where 40 are noise is fundamentally different from one with 15 alerts per week where 12 require action." [18]
A practical rule of thumb: if an alert doesn’t require action more than 30% of the time, it should either be deleted or converted into a ticket [18]. For example, one production cleanup reduced weekly alerts from 200 to just 15 while still catching all critical incidents [19]. This kind of alert hygiene should be done before the handover to avoid burdening the incoming team.
Every alert should link directly to a dashboard with a consistent layout: the alert metric at the top, upstream and downstream signals in the middle, and log volume at the bottom [19]. This setup ensures engineers know exactly where to look during an incident.
Runbooks for Common Incidents
Every alert must have a corresponding runbook - a step-by-step guide that even a new engineer can follow at 3 AM without needing to call anyone [22]. A solid runbook should include:
- Symptoms: What the issue looks like in production.
- Impact: Which users or features are affected.
- Diagnostics: Ordered steps to identify the root cause.
- Resolution: Exact commands or actions to fix the issue.
- Escalation: Who to contact if the steps don’t resolve the problem [20][23].
Avoid vague instructions like "check the database." Instead, include precise commands, such as psql -h db-prod -U app -c "SELECT 1;", along with the expected healthy output [20][21].
"A runbook that describes a system that no longer exists is worse than no runbook - it sends engineers down dead-end diagnostic paths." - The Good Shell [21]
At a minimum, runbooks should cover these incident categories:
| Incident Category | Scenarios to Cover |
|---|---|
| Application | High API error rates, crash loops, missed scheduled jobs |
| Infrastructure | High CPU usage, full disks, pod scheduling failures |
| Connectivity | DNS resolution failures, SSL/TLS certificate expirations |
| Database | Connection pool exhaustion, high replication lag, read-only states |
Runbooks older than 90 days should be reviewed and updated before the handover [18][19]. Outdated runbooks can cause more harm than good.
Transition Plan and Knowledge Transfer
With technical documentation and incident runbooks in place, the final step is a structured knowledge transfer process. This live handover ensures the incoming team is fully prepared for ownership.
The outgoing team should schedule overlap time for live walkthroughs of the codebase, key decisions, and Q&A sessions. A shadow period - where the incoming team handles real tasks like deployments and bug fixes under the outgoing team’s supervision - can drastically reduce post-handover issues. Teams using this approach report 70% fewer incidents during the transition period [1].
Record all walkthrough sessions. As the URS Development Team noted:
"A 15-minute recording of someone explaining a complex subsystem often conveys more than pages of documentation." [1]
The transition plan should follow a clear timeline:
- Preparation: Update READMEs, pin dependencies, and export workflows.
- Live handover sessions: Conduct recorded demos and open Q&A.
- Formal ownership transfer: Hand over GitHub and cloud admin rights, rotate secrets, and complete the final sign-off.
Immediately after ownership transfer, rotate all credentials - API keys, secrets, and shared passwords - to ensure the outgoing team no longer has access. Plan for a stabilization period of 4-8 weeks, focusing on environment setup and critical fixes rather than new feature development.
Conclusion: Getting Code Handover Right
A successful code handover isn’t just about passing along files - it’s about ensuring operational independence and providing complete documentation. When done right, it transfers not just the code, but also its history, technical reasoning, and operational control.
The ultimate test of a proper handover is whether the incoming team can function independently from day one. One of the most effective ways to confirm this is through the Reproducibility Test - having a developer, who wasn’t involved in the project, set up the environment and deploy the system using only the provided documentation. This method ensures that the handover materials are clear and actionable [5]. Another crucial step is verifying that all third-party accounts - such as domains, SSL certificates, app stores, and payment processors - are registered under your organization’s name. After all, legal ownership of the code means little if the vendor still controls the infrastructure [5].
To avoid misunderstandings, define the handover package as a formal contractual deliverable. Set clear exit criteria during the first week and include a 30-90 day post-launch support window to address any lingering issues [4][24]. Following a structured process like this has been shown to reduce post-handover incidents by 70% [1].
"A software handover checklist is not just administrative closure. It is a strategic protection mechanism for long-term technology ownership." - Tech4LYF Corporation [2]
FAQs
What should I require in a code handover from an outsourced team?
A proper code handover is more than just passing along the source code. To ensure smooth operations and avoid hiccups, here’s what you should include:
- Complete Source Code: This means everything - backend, frontend, and any custom modules. Also, make sure you have access to all relevant repositories.
- System Documentation: Request detailed system architecture diagrams, API references, deployment instructions, and environment configurations. These documents are crucial for understanding how everything fits together.
- Infrastructure Access: Secure access to servers, hosting accounts, and CI/CD pipelines. Without these, deploying or maintaining the system could become a major challenge.
- Intellectual Property Agreements: Verify that all intellectual property rights are transferred appropriately. This ensures you have legal ownership of the code and related assets.
- Security and Testing Records: Include documentation on security protocols, past vulnerabilities, and testing records to maintain system integrity and compliance.
- Knowledge Transfer Plan: A well-structured plan for knowledge transfer is key. This helps your team get up to speed quickly and reduces dependence on the original developers.
Covering these bases ensures you’re equipped to manage and maintain the project with confidence.
How can I verify we’re truly “operationally independent” after handoff?
To ensure your team operates independently, they need full control over essential systems such as repositories, hosting accounts, domains, databases, CI/CD pipelines, and API accounts. Confirm they have the ability to deploy, roll back, and monitor the system without outside assistance. Conduct a thorough security review to verify that all credentials and infrastructure access have been handed over. True independence is reached when the team can manage everything without depending on the previous vendor or external support.
What’s the fastest way to spot risky services and prioritize tech debt post-handover?
The fastest way to tackle this is by leveraging AI-powered assessments alongside a Traffic Light Roadmap to categorize code into three levels: Critical (Red), Managed (Yellow), and Scale-Ready (Green). Start by prioritizing high-impact areas, such as frequently used modules. Address Red issues first with small, incremental updates and integrate automated quality checks to maintain stability while making progress.
Related Blog Posts
- What to Do When Your Outsourced Project Goes Off Track: A Founder’s Guide
- How to Transition from One Outsourced Partner to Another Without Losing Momentum
- Your Outsourced Team Ships Fast. But Who’s Reviewing What They Leave Behind?
- Outsourced Frontend Team Onboarding: What We Send Every New Client in the First Week and Why