Blog20 min read
AI Prompts for Debugging Legacy Code: Getting Useful Output From Codebases an LLM Has Never Seen
By Taher Pardawala · Co-Founder & Chief Executive Officer

Debugging legacy code is hard. No tests, outdated documentation, and hidden dependencies make it a time sink. But AI can help - if used correctly. Here’s how to get the most out of AI when working with unfamiliar codebases:
- Start Small: Share only the most relevant context (e.g., architecture map, stack trace, or key files) to avoid overwhelming the AI.
- Force Assumptions: Prompt the AI to explicitly list assumptions about the code so you can verify them.
- Ask for Testable Outputs: Request specific, actionable suggestions like test cases or step-by-step logic traces.
- Map Functions: Guide the AI to break down inputs, outputs, and edge cases for undocumented functions.
- Trace Dependencies: Provide detailed call chains and error messages to help the AI pinpoint cross-module issues.
- Generate Tests: Use AI to create boundary and regression tests for legacy functions, prioritizing current behavior over correctness.
- Document Behavior: Separate what the code does from what it was intended to do, highlighting discrepancies for review.
- Apply Safe Fixes: Use strict constraints to ensure AI-proposed changes are minimal and reversible.
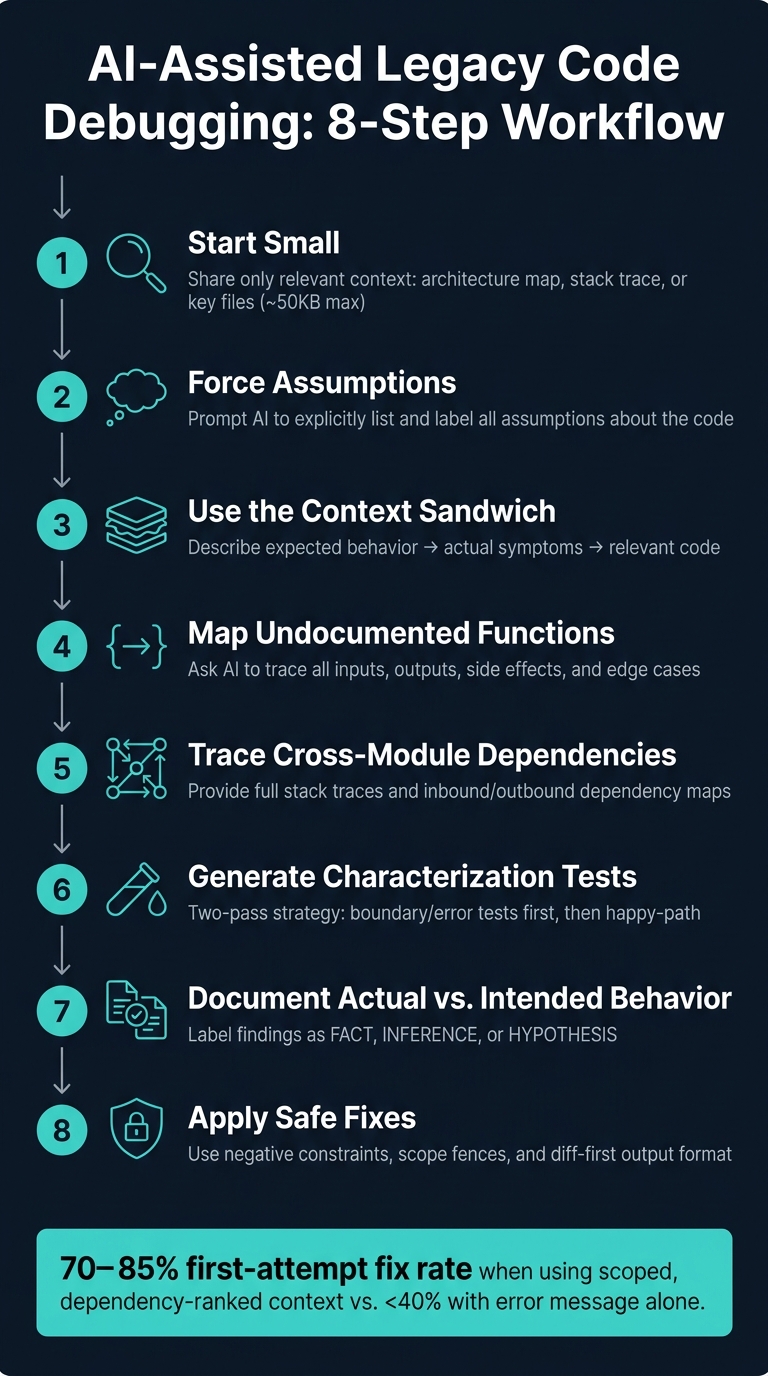
AI-Assisted Legacy Code Debugging: 8-Step Workflow
Finding and Fixing Issues with Legacy Code using AI - Venkat Subramaniam
How to Use AI Effectively for Legacy Code Debugging
Using AI for debugging legacy code can be a game-changer, but it requires a thoughtful approach. Success depends on sharing the right context, asking clear questions, and guiding the AI toward actionable outputs. Here’s how to make the most of it.
Providing Just Enough Context Without Hitting the AI Context Window Limit
Dumping too much code into an AI prompt isn’t helpful. Instead, focus on a 50KB context that includes an architecture map, a stack trace, and a few relevant files. This setup is far more effective than overloading the AI with a 600KB dump of unrelated modules [5].
A smart strategy is progressive disclosure. Start with just the error message and symptoms, and only share additional files as the AI requests them. For better results, create a concise CLAUDE.md or AGENTS.md file in your repository. This file should outline the service layout, data flow, and any fragile areas. Keep it under 8KB - it’s far more useful than hundreds of raw code lines.
Interestingly, providing business context often trumps sharing more code. For example, including a pull request (PR) description in your prompt can improve the AI’s accuracy on code review tasks by 72.17%. Adding an issue description bumps that accuracy to 79.93% [2]. The reasoning behind legacy logic is often more valuable than the code itself. To save token space, strip out lockfiles, vendor folders, and unrelated modules - they don’t add value and quickly eat up your token budget.
Finally, make sure the AI communicates its assumptions clearly.
Getting the AI to State Its Assumptions Clearly
When analyzing unfamiliar code, AI will fill in gaps with its own assumptions - but it won’t always tell you unless prompted. The solution? Ask it to surface those assumptions explicitly.
Treat the AI like a new senior engineer. Give it instructions like: "After analyzing each file, list any assumptions or implied contracts. Clearly mark guesses." This approach transforms vague summaries into something you can verify. You can also request a plain-English list of business rules the AI infers from the code. Then, compare this list with input from a domain expert to ensure accuracy [1].
"Legacy code is full of decisions that look like accidents but aren’t. AI sees the surface and reasons about the surface. Legacy reasoning lives underneath the surface." - Nazar Boyko [1]
Asking for Minimal, Testable Answers
Once you’ve set the context and clarified assumptions, focus on getting precise, actionable outputs. This means requesting testable and specific answers.
To achieve this, constrain the scope of each request. For example, ask the AI to propose one hypothesis at a time or suggest one test at a time. Limit AI-generated changes to under 300 lines across no more than three files [1].
One effective technique is the Context Sandwich: start by describing the expected behavior, then outline the actual symptoms, and finally provide the relevant code. This structure helps the AI focus on the target behavior before diving into the code. If you need the AI to trace execution, use the phrase "walk through the logic step-by-step." This forces a detailed trace, which is often where the real issues become apparent [7].
Prompting AI to Map Undocumented Function Behavior
Undocumented functions can feel like a puzzle, but AI can help decipher them when guided the right way. A useful technique is to approach the task as if you’re a new engineer tasked with decoding the function. This mindset encourages AI to move beyond surface-level summaries and deliver a detailed breakdown of inputs, outputs, side effects, and those tricky edge cases that might otherwise go unnoticed.
"The problem with treating AI like a reader is that it reads what you give it. If you give it one file without context, it gives you one file’s worth of insight." - The AI Leverage Weekly [3]
To get the most out of AI, ask it to explore every possible code path - not just the "happy path." This means identifying where data could be dropped, coerced, or mishandled, and where error handling might be missing. For instance, this approach once uncovered a transformation function that returned undefined when given mismatched input [3]. Insights like this can pave the way for a structured and systematic prompt to map out function behavior.
Prompt Template for Mapping Function Behavior
Here’s a practical template you can use to analyze undocumented functions:
You are a senior software architect joining a legacy codebase for the first time. Analyze the function {function_name} in {file_name}. Do the following:
- List all inputs and their expected types.
- Describe all possible outputs, including return shapes and edge case returns.
- Identify any side effects (database writes, external calls, state mutations).
- Trace every code path and flag where data might be dropped, coerced, or lost.
- List any "load-bearing" logic - code that looks fragile but is likely critical to keep.
- Note any constraints:
{constraints}. - Cite the corresponding line or logic for each conclusion.
The {constraints} section is critical for adding system-specific details. For example, you might specify, "this function runs inside a transaction" or "this service cannot make synchronous external calls." Including this context helps the AI avoid suggesting changes that could unintentionally disrupt downstream systems.
Once you’ve mapped out the function, the next step is to separate what the code actually does from what it was likely intended to do.
Separating Observed Behavior from Likely Intent
With a detailed functional map in hand, you can begin to distinguish the code’s observed behavior from its likely purpose. This distinction is essential in legacy systems, where intent and behavior often diverge. Failing to separate the two can lead to refactoring mistakes that introduce new issues.
To make this clearer, prompt the AI to organize its findings into three layers: facts based on code, inferences with supporting evidence, and hypotheses needing confirmation [9]. For example, a peculiar retry loop might not just be a bug - it could be a workaround for a flaky upstream service that existed years ago. AI can spot these patterns and flag them as remnants of past constraints rather than deliberate design choices. A simple instruction like "For each behavior you identify, state whether it reflects the likely business intent or appears to be an artifact of past constraints" can uncover the difference between logic that can be safely modified and logic that’s holding the system together.
"Legacy code is not bad code. It is code that survived. Survival is information. Most refactors fail because they discard the information." - Nex Tools [8]
Prompting AI to Trace Breaking Changes Across Modules
Building on the idea of function-level mapping, let’s dive into how to track changes that ripple across modules.
Cross-module failures are some of the toughest bugs to diagnose. Imagine tweaking one file, only to have something break in a completely different part of the system - without any clear connection. The core issue? AI lacks an inherent "mental map" of your system to uncover those hidden dependencies. As Nova Elvaris explains:
"Most ‘AI-assisted coding’ failures aren’t really model failures. They’re map failures." [11]
To help the AI identify the problem, you need to provide a detailed dependency map. This should include both outbound dependencies (what the changed file depends on) and inbound dependencies (what depends on the changed file). Together, these paint a complete picture of the "blast radius" of your change, showing which modules might be affected and why.
Key Rule: Share Full Error Messages
For cross-module debugging, never paraphrase error messages. Always include the full stack trace, as trimming it can remove the critical call chain the AI needs to follow. Additionally, include any configuration, dependency, or infrastructure changes that occurred in the last 48 hours - these are frequent culprits behind cross-module failures.
Prompt Template for Debugging Cross-Module Issues
Here’s a template to guide the AI when a change in one module causes unexpected issues elsewhere:
You are a senior engineer debugging a cross-module regression in a legacy system. A change was made to {changed_file}. Since then, the following symptoms have appeared: {observed_symptoms}.
Here is the full error message and stack trace: {full_stack_trace}
The following files are likely involved in the dependency chain: {file_1}, {file_2}, {file_3}. Their relationships are: {describe_how_files_connect}.
Tasks:
- Trace the call chain backward from the error location to identify what calls the affected function and where the data originated.
- List all inbound dependencies - modules that directly depend on
{changed_file}. - List all outbound dependencies - what
{changed_file}relies on. - Identify the most likely failure point and explain why.
- Outline the failure path without proposing a fix.
- If dependency details are missing, state "unknown" and specify the file needed to confirm it.
- Constraints:
{system_constraints}.
The {describe_how_files_connect} section is crucial. Even a simple note like "the type definition lives in models/user.ts and is imported by auth/token.go for validation" provides the AI with enough context to avoid misinterpreting the issue.
Verifying Likely Failure Points
Once the AI maps the call chain, the next step is verification, not rushing to a fix. Ask the AI to generate three ranked hypotheses for what might have caused the failure. Each hypothesis should include a specific way to test it - like adding a targeted log statement, writing a unit test, or running a git bisect command. This structured approach avoids the trap of assuming that symptom resolution equals a root cause fix.
"The most common failure mode in bug hunting - with Claude or without - is jumping from ‘I see a symptom’ to ‘I changed something and the symptom stopped.’ That’s not a fix; that’s a coincidence with a commit hash." - Suraj Maurya, Backend & Data Engineer [13]
For particularly complex dependency chains, consider asking the AI to create a Mermaid flowchart of the call path. Seeing the flow visually can make it much easier to identify where the data diverges from its expected route. Developers who use this kind of scoped, dependency-ranked context report first-attempt fix rates of 70-85% for production bugs - far better than the sub-40% success rate when only an error message is provided. [12]
Generating Test Cases for Untested Legacy Functions
Now that failure points have been identified, the next step is to safeguard the legacy system by generating effective test cases. Once the AI maps out code behavior or pinpoints failure areas, creating these tests is crucial to preserve existing functionality and avoid unnoticed regressions. For legacy functions with no prior test coverage, AI can quickly generate a complete test suite - sometimes in just 1-2 hours - provided it’s guided with the right prompts [18].
Characterization testing focuses on capturing the current behavior of the code, even if that behavior includes bugs. Why? Because downstream systems may rely on those quirks. As Brian Austin explains:
"You’re not testing for correctness, you’re testing for behavior. If the legacy code has a bug that’s been there for 5 years, the characterization test should capture that bug." [6]
Start by performing a gap analysis. This involves listing uncovered branches, risky inputs, and potential failure points in plain language. Spending just two minutes reviewing this list can help you catch domain-specific gaps that AI might overlook. For example, a payment function might behave differently when the transaction amount is exactly $0.00 - an edge case worth testing.
Prompt Template for Test Case Generation
When generating test cases, a two-pass strategy works best. Start with boundary and error-path tests, then move on to happy-path scenarios. This approach ensures the AI prioritizes edge cases and avoids skipping over inputs that could lead to production failures.
Here’s a prompt template for generating characterization tests:
You are a Senior Test Engineer working on a legacy {language} codebase. Your task is to generate characterization tests for the function {functionName} located in {filePath}.
Here is the full function implementation: {paste_full_function_code}
External dependencies this function calls: {list_external_dependencies}. Specify external dependencies to mock and note pure functions to exclude. Testing framework: {framework_name}. Runtime version: {runtime_version}.
Pass 1 - Boundary and error inputs only:
- Write tests for: null, undefined, empty strings, zero, negative numbers, max integer, NaN, and malformed input.
- Pin the exact error class, error code, and message content for any thrown exceptions.
- Do not write happy-path tests yet.
Pass 2 - Normal and regression cases:
- Write tests for the expected happy-path behavior.
- If
{failingInput}is provided, write one regression test that locks in the fix.
Constraints: Do not modify the function. Do not test for correctness - test for current behavior. Use should <behavior> when <condition> naming. {additional_constraints}.
When using this template, make sure the {list_external_dependencies} and mock guidelines are accurate. If not, the AI might over-mock - even pure functions - which can result in tests that pass regardless of actual logic [16][17].
Choosing Between Test Descriptions and Test Code as Output
The type of output you request depends on your goal. For non-technical stakeholders, plain-language test descriptions work best. For documenting fragile modules, characterization code is more useful. And if you’re hardening the code against crashes, focus on boundary and error tests.
| Output Type | Best Use Case | Prompt Strategy |
|---|---|---|
| Plain-Language Descriptions | Gap analysis, risk assessment, stakeholder review | "List the missing test cases in order of risk." [14] |
| Characterization Code | Documenting current behavior of fragile legacy modules | "Write tests that capture current behavior. Don’t test for correctness." [6] |
| Boundary/Error Code | Hardening code against crashes and malformed input | "Write tests that ONLY cover boundary and error inputs." [16] |
Verifying Test Quality
Once the AI generates test code, it’s essential to check its effectiveness. A simple way to do this is by flipping a boundary condition in the function and re-running the tests. If they still pass, the assertions are too weak to catch real failures. As Dennis Traina from 137Foundry advises:
"The fastest way to inherit technical debt from AI tooling is to accept generated tests without verifying they catch real failures. One quick mutation check takes sixty seconds and tells you more about test quality than reading the assertion code." [15]
A quick mutation check - just 60 seconds - can reveal whether your tests are strong enough to catch actual issues.
Documenting Actual vs. Intended Behavior in Legacy Code
Once you’ve solidified behavior through test cases, the next step is to document what the code actually does compared to what it was intended to do. The tricky part with legacy code? It often only reflects what it was supposed to do, not what it actually does. That’s where AI can step in - by providing a clear, side-by-side comparison of observed behavior versus original intent, highlighting any discrepancies. This approach helps uncover where the code’s behavior has veered off course over time. The prompt template below shows how to document these differences effectively.
A critical aspect of this process is treating the code itself - not comments or function names - as the ultimate source of truth. As Nex Tools explains:
"Legacy code is not bad code. It is code that survived. Survival is information. Most refactors fail because they discard the information." [8]
Prompt Template for Actual vs. Intended Behavior
Here’s a template you can use to create a structured comparison of behavior for any undocumented legacy function:
You are a senior backend engineer documenting a legacy {language} codebase for a new team. Analyze the function {functionName} in {filePath}.
Here is the full function code: {paste_full_function_code}
Related context (caller code, config, or adjacent modules): {paste_relevant_context}
Produce a documentation block with three sections:
- Actual Behavior - Describe what this function does based solely on the code. Walk through every possible code path and identify silent failures, such as returning
undefined,-1, or swallowing exceptions without logging. - Likely Intended Behavior - Based on the function’s name, structure, and any inline comments, infer what the function was likely designed to do.
- Behavior Delta - Highlight where actual and intended behavior diverge. For each instance, specify whether it’s a bug, an undocumented feature, or evidence of architectural drift.
Label each statement as either: FACT (directly observable from the code), INFERENCE (supported by evidence but not explicit), or HYPOTHESIS (requires human confirmation). {additional_constraints}
A real-world example of this approach comes from Nex Tools, which applied a similar workflow to a 500-line legacy module in April 2026. The AI-generated documentation uncovered a critical detail: an "unknown" error case returned a specific HTTP status code or -1 on timeout. This behavior was buried in the code and absent from any existing documentation, making it a vital discovery. [8]
Flagging Ambiguities and Risky Assumptions
Using the FACT / INFERENCE / HYPOTHESIS labels doesn’t just organize findings - it also highlights potential risks. Specifically, anything labeled as a HYPOTHESIS points to an assumption that needs verification. To make these assumptions more transparent, you can extend the base prompt like this:
"After the documentation block, list every assumption you made that required inference. For each one, write a specific question a developer would need to answer before safely modifying this function."
This ensures that all assumptions are flagged for further review.
| Ambiguity Type | What to Look For | AI Prompt Action |
|---|---|---|
| Silent Failures | Returns undefined or -1 without logging |
"List every code path that exits without an explicit error" |
| Implicit Contracts | Callers depend on a specific return shape | "Identify assumptions the caller makes about this function’s output" |
| Architectural Drift | Implementation no longer matches function name or design pattern | "Flag where the implementation diverges from the apparent original intent" |
| Load-Bearing Bugs | Bugs that downstream systems now rely on | "Note any behavior that looks incorrect but may be intentionally preserved" |
Once the AI generates the documentation block, take it a step further. Provide the caller code and ask whether the caller’s assumptions align with the documented behavior. This cross-check often uncovers mismatches that wouldn’t be obvious from looking at the function or the caller in isolation.
Choosing the Safest Change in a Fragile System
When working with a fragile system, maintaining its existing functionality is non-negotiable. The goal is to apply the smallest, most precise fix that resolves the issue without introducing new problems. Broad, sweeping changes are rarely an option in these cases. Instead, the focus should be on pinpointing a solution that keeps the system stable while addressing the bug.
As Pranay Joshi, VP of Product & Engineering, aptly states:
"The more you restrict what the AI can change during a refactor, the safer the result. Think of refactoring prompts as a set of rules about what NOT to touch." [19]
This is where negative constraints come into play. Rather than guiding the AI on what to change, you specify what it must not alter. This approach ensures that the system remains as untouched as possible, preserving its fragile balance.
Prompt Template for Safe Change Recommendations
Here’s a practical template designed around four key constraints: a scope fence, a behavioral contract, negative constraints, and a diff-first output requirement. Together, these elements guide the AI toward providing a precise fix without overstepping boundaries.
You are a senior {language} engineer working on a fragile legacy system. Your task is to recommend the safest fix for this issue:
{describe_the_bug_or_problem}
Here is the relevant code: {paste_function_or_module_code}
Files permitted to modify: {list_specific_files_only} (Only modify the files listed; all others must remain unchanged.)
Behavioral contract: The function must accept the same inputs and return the same outputs for every possible case, including edge cases and error states.
Do NOT:
- Change any public function signatures
- Alter the database schema or any external interface
- Modify error handling unless it directly causes the bug
- Introduce new dependencies
Output a numbered migration plan of intended changes and await confirmation before proceeding.
When you do produce output, format it as a unified diff only - not as a full file rewrite.
The "plan-before-diff" step is especially important. By requiring the AI to outline its proposed changes before generating code, you can catch any potential redesign efforts early. This makes it easier to review and adjust the plan before any code is written.
Ranking Changes by Risk Level
Once the AI outlines its proposed changes, the next step is to evaluate each option’s scope and risk to the system. Ask the AI to rank the risks for each proposed change, focusing on these key factors:
- Blast Radius: How many modules or callers could be impacted?
- Testability: Can the change be verified using existing tests, or are new tests required?
- Rollback Ease: How quickly can the change be reversed if it causes issues?
Nova Elvaris emphasizes the importance of minimal output formats in this process:
"Diff-first prompting improves reliability for a boring reason: it shrinks the solution space." [20]
To align risk assessments with the proposed changes, you can structure your prompt using a table like this:
| Risk Dimension | What to Ask the AI |
|---|---|
| Blast Radius | "Trace the import graph and list every call site affected by this change." |
| Testability | "Which existing tests cover this path? What new test would verify the fix?" |
| Rollback Ease | "How would a developer revert this change in under 10 minutes if it caused an issue?" |
| Behavioral Delta | "List every place where semantics could differ between the old and new code." |
A practical way to manage risk is by having the AI categorize each proposed change as PROCEED, PROCEED_WITH_GUARDS, REVISE_SPEC, or BLOCK. This forces the AI to justify its recommendations explicitly, ensuring that every suggestion is grounded in the actual code. Including file and line references further anchors these assessments in real-world context, making the process more transparent and actionable.
Conclusion: Getting More Out of AI When Debugging Legacy Code
Using the prompting strategies outlined earlier, you can shape AI outputs to be more accurate and helpful before any code is even written. It all starts with how you define the problem, the context you provide, and the specific constraints you establish. As Dennis Traina, Founder of 137Foundry, explains:
"The biggest mistake teams make with AI-assisted legacy modernization is treating the AI output as final rather than as a starting draft." [10]
This highlights the importance of structuring prompts effectively to achieve better debugging results. Each AI-generated draft serves as an initial step, requiring your review and refinement. While the AI can quickly handle initial investigations and create test cases, you remain in charge of diagnosing and guiding the process.
To streamline future debugging efforts, maintain a concise system overview file at the root of your repository. This simple step can save time and effort during onboarding. [4] [10]
The aim isn’t to let AI take over your entire codebase but to offload repetitive, time-consuming tasks. This way, you can concentrate on addressing the critical issues that truly demand your expertise.
FAQs
What should I include in a prompt if I can’t share much code?
When sharing a small snippet of code, it’s important to use progressive disclosure to introduce context step by step. Begin by outlining the issue: describe the symptom, share the most relevant entry-point file, and include exact details like error logs, stack traces, and reproduction steps. Organize your information clearly by breaking it down into the problem, the expected behavior, and the environment in which the issue occurs. Allow the model to guide the conversation by requesting further details - such as specific files or functions - so the focus remains sharp and the context window is used efficiently.
How do I validate AI suggestions before changing fragile legacy code?
To ensure AI suggestions are reliable, start by building a safety net with characterization tests to document the current behavior - bugs included. Next, identify dependencies by having the AI trace imports and call sites.
Before implementing changes:
- Test the AI’s predictions using example inputs to confirm accuracy.
- Double-check constraints with the AI to avoid unexpected issues.
- Compare the original and refactored code in a controlled environment to ensure consistency.
- Conduct a manual review to spot any dynamic patterns the AI might have overlooked.
How can I tell if a “bug” is actually relied-on behavior?
To figure out if a bug is actually relied-on behavior, start by creating characterization tests. These tests document the system’s current outputs, covering everything from standard cases to edge cases and error scenarios. AI tools can be a big help here - they can generate specifications that capture these behaviors in detail. If you discover that downstream systems depend on a particular outcome, even if it looks wrong, you should treat that outcome as a constraint. Before you dive into refactoring, always run these tests on the existing code to confirm how it behaves.